Workstation detail:
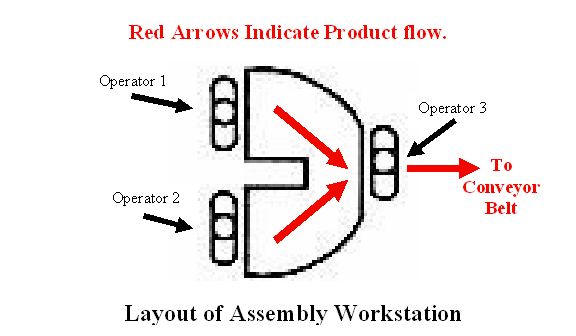
Operator 1: This operator assembles the upper half of the mouse; including the COVER, BUTTONS and WEIGHT.
Operator 2: This operator assembles the lower half of the mouse; including the BASE, PCB and. SCROLL WHEEL assembly.
Operator 3: This operator connects the USB CABLE to the PCB and attaches the UPPER assembly of the mouse to the LOWER assembly, then once the mouse is fully assembled the operator connects the mouse to a testing device to perform a functionality test.
| Assembly Instructions | ||
| Sub-Assembly #1 (Operator #1) | ||
| 1 | Grab Cover | |
| 2 | Grab Buttons | |
| 3 | Snap into place | |
| 4 | Pick up Weight, place in location | |
| 5 | Pick up 2 screws, screw in with auto. screwdriver | |
| 6 | Place sub-assembly on tray | |
| Ave. Assembly Time (sec) | 25 | |
| Sub-Assembly #2 (Operator #2) | ||
| 1 | Grab scroll wheel, grease | |
| 2 | Grab scroll base | |
| 3 | Snap into place | |
| 4 | Grab base | |
| 5 | Snap scroll wheel assembly onto base | |
| 6 | Grab diffuser and circuit board | |
| 7 | Place diffuser on PCB | |
| 8 | Place and align PCB onto base | |
| 9 | Place on tray | |
| Ave. Assembly Time (sec) | 27 | |
| Final Assembly (Operator #3) | ||
| 1 | Grab sub-assembly #2 | |
| 2 | Place onto fixture | |
| 3 | Grab USB cable | |
| 4 | Connect cable to PCB, correctly route cable | |
| 5 | Grab sub-assembly #1 | |
| 6 | Align and snap together sub-assembly #1 with #2 | |
| 7 | Grab and place screw, screw with auto. Screwdriver | |
| 8 | Place on tray | |
| Ave. Assembly Time (sec) | 25 | |
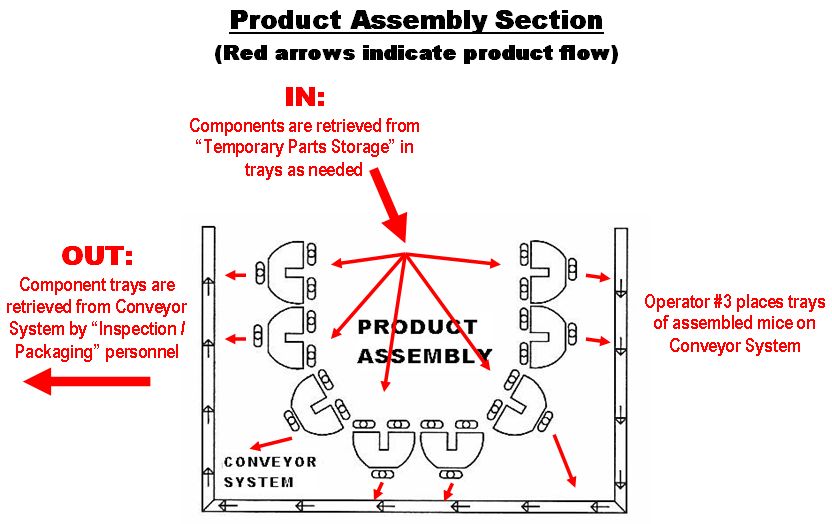
Prior to the start of the shift Operators #1 and #2 grab the components trays necessary to start their assembly operations. Operator #3 receives the components he/she assembles from Operators #1 and #2.
The work performed by Operator #3 affect one of the critical points on the PCB, namely the USB Base Connector.
Click here for an illustration of the critical points affected by Operator #3.
The Number of rejected PCB Board due to USB Base Connector Problems is recorded at the end of every shift.