MANE 3351 - Manufacturing Engineering Analysis
Laboratory 2 Assignment
Assigned: October 13, 2021
Due: October 19, 2021
Learning Goals
- Use git to clone teaching repository,
- Download Laboratory Two Assignment,
- Run Jupyter Notebook on Raspberry Pi
- Update Jupyter Notebook
- Upload Lab Two Assignment
Description
There are two main purposes for this lab: learn to use git and start using Jupyter Notebooks. In Lab Two, you will clone Dr. Timmer's teaching repository on your Raspberry Pi and also download a laboratory repository from GitHub classroom, run Jupyter Notebook, make a minor edit and save the Jupyter Notebook and upload your repository for grading.
Step 1
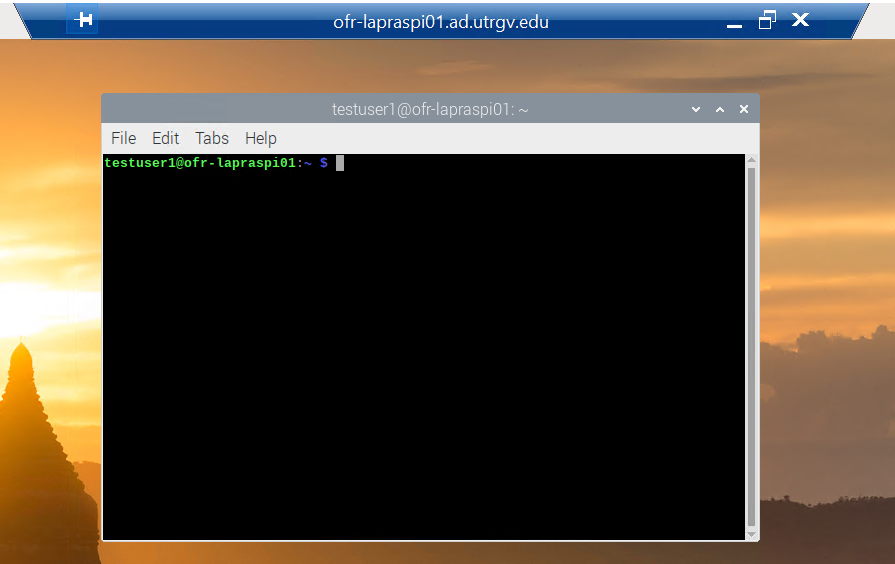
Login to your Raspberry PI virtual machine (VM) or use your physical Raspberry Pi and start a terminal session by clicking on the terminal icon that is circled.

A terminal session will appear.
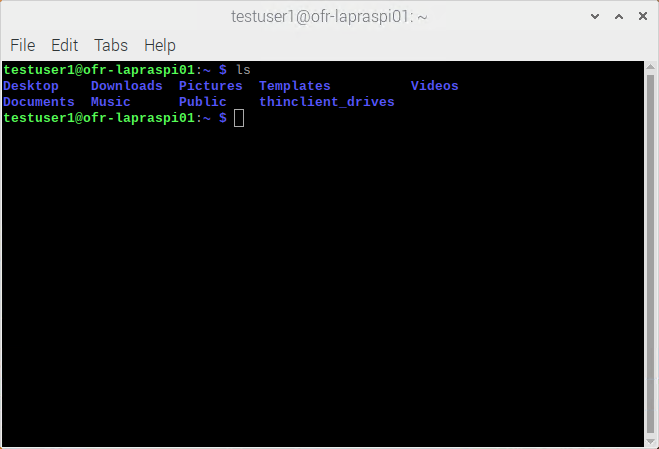
Type ls in the terminal session to display a list of files.
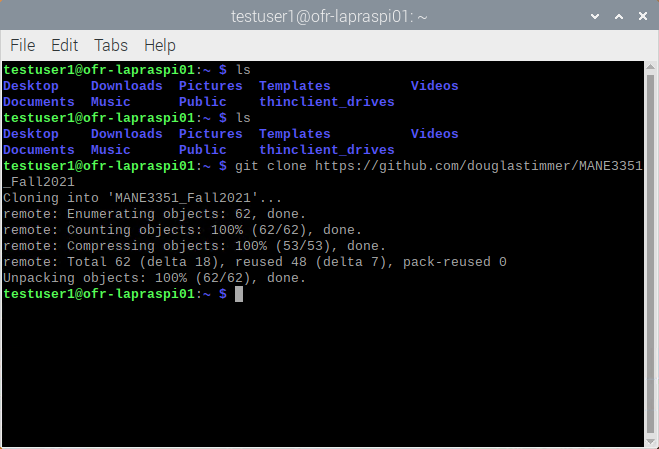
To copy Dr. Timmer’s Teaching repository type the following command in the terminal session git clone https://github.com/douglastimmer/MANE3351_Fall2021 and hit enter. The results of the git clone command are shown below. Note that git clone copies a git (or gitHub) repository that you have access privileges to.
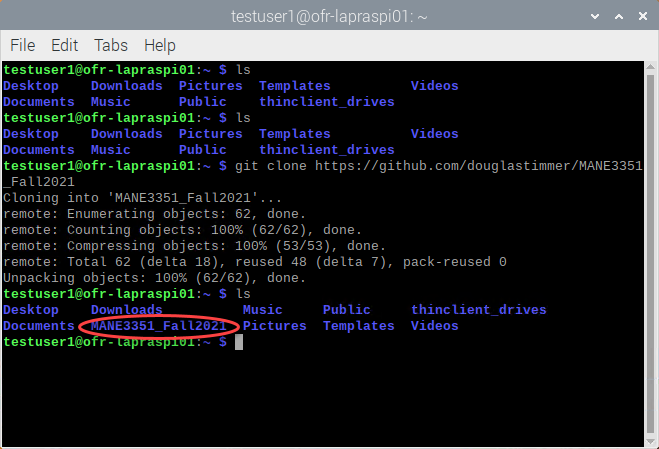
After the git clone operation and observe that there is a new directory that stores the results (circled directory).
Change directory into the teaching repository by issuing the command cd MANE3351_Fall2021.
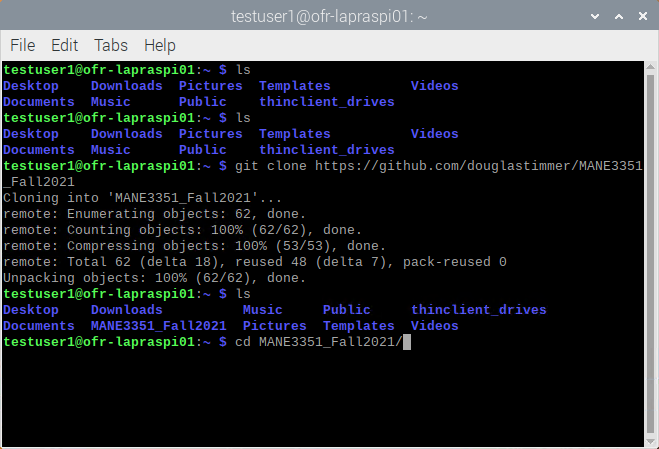
If you want to update your local copy of the teaching repository, issue the command git pull when you are in the directory storing the repository.
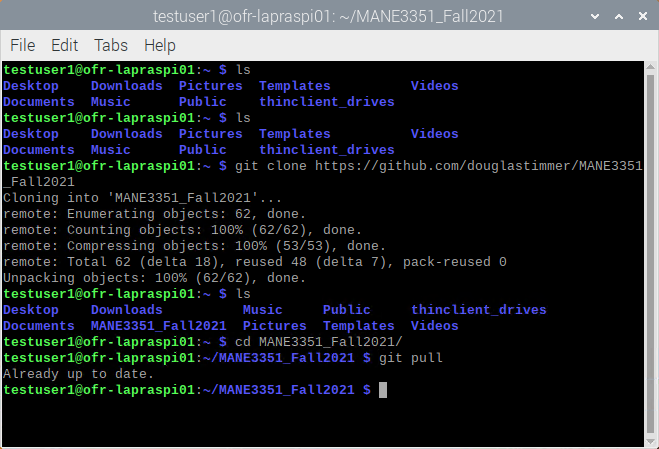
In this case, there were no changes to the teaching repository. So, the output is Already up to date.
Step 2 - Configure GitHub
GitHub has switched its method of authentication from the last time this course was taught. In the past, one could access GitHub repositories with your GitHub username and password. Now, token-based authentication is required.
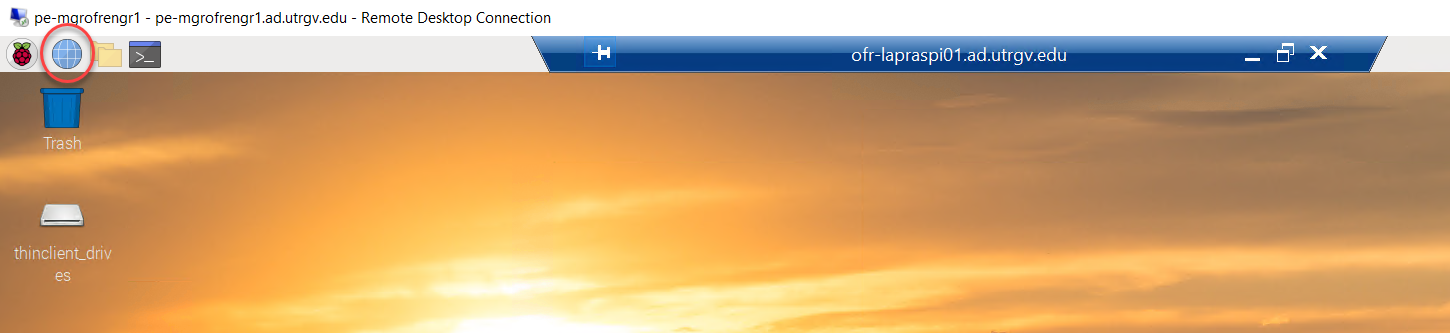
Start by opening a web browser in your Raspberry Pi VM by clicking on the circled icon.
Enter GitHub.com in the URL area of the web browser.
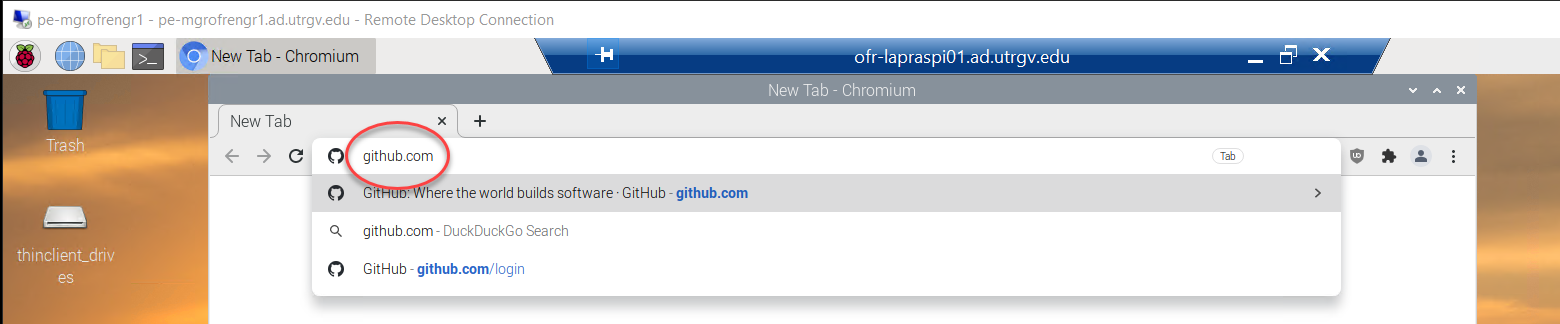
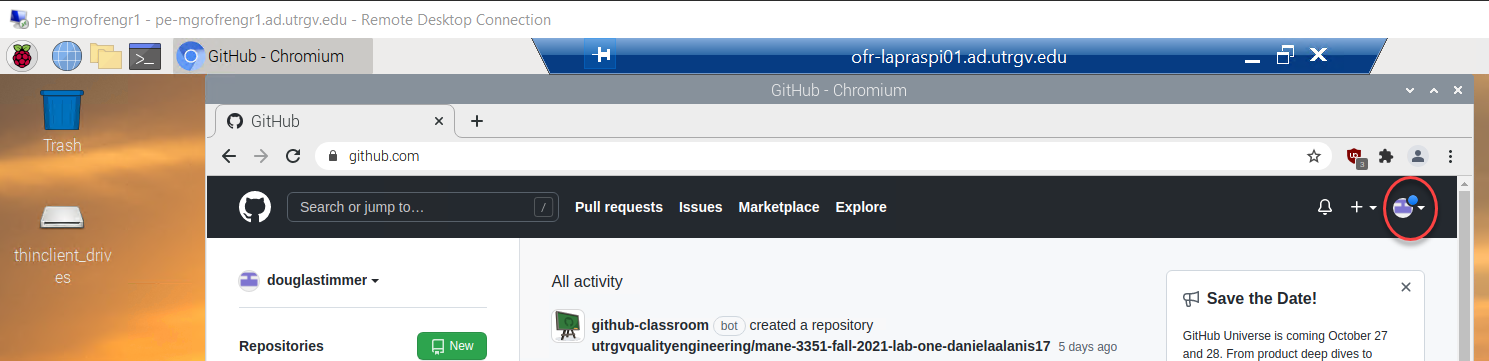
You may need to sign in. In my case, the browser remembered my GitHub login from a previous visit. Click on the circled icon to begin changing your settings.
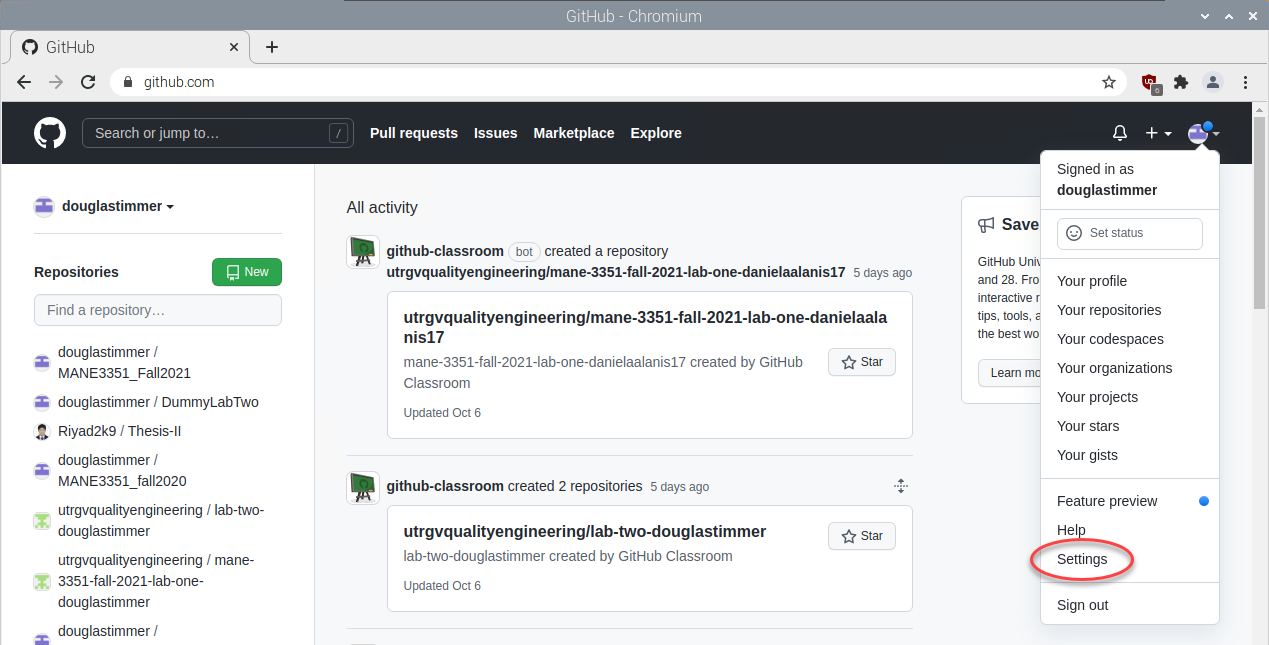
Click on Settings at the bottom of the drop down menu.
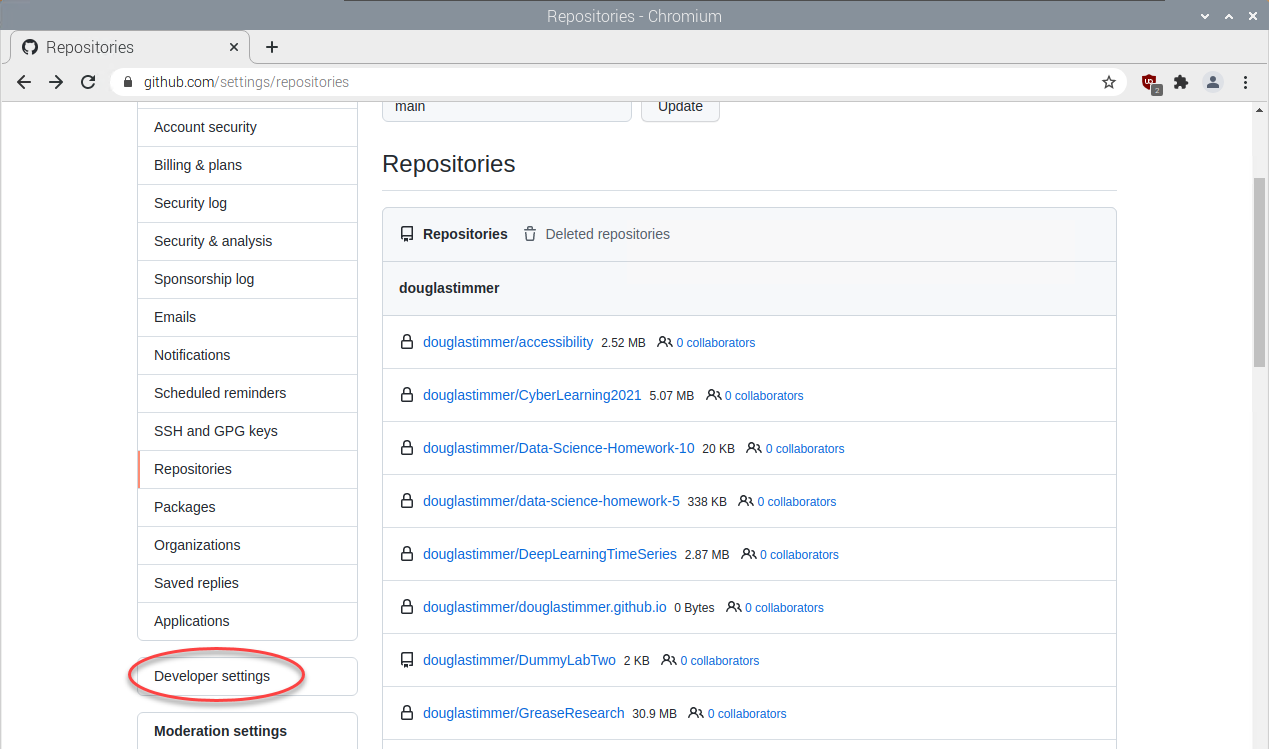
Scroll down the drop down menu for settings and click on Developer settings.
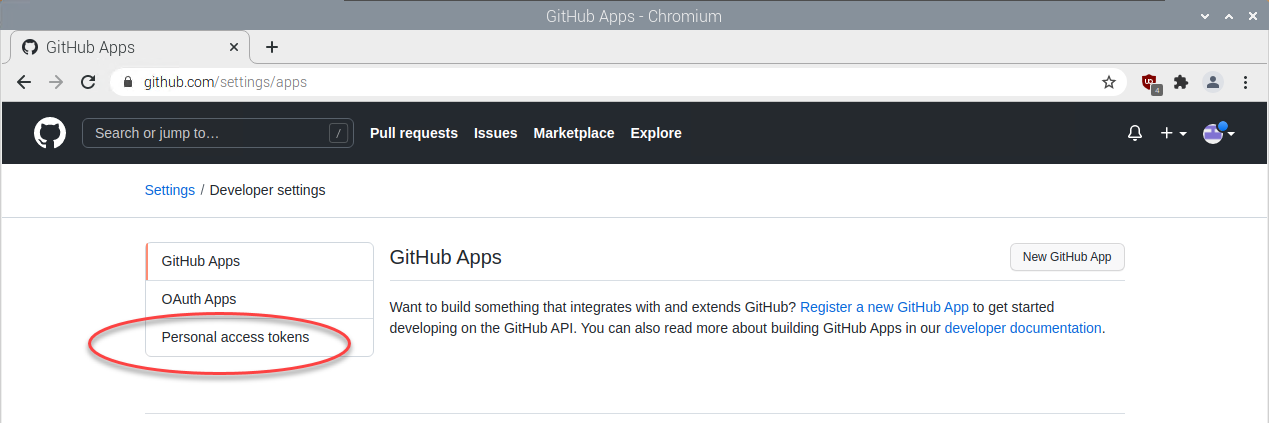
Click on Personal access tokens.
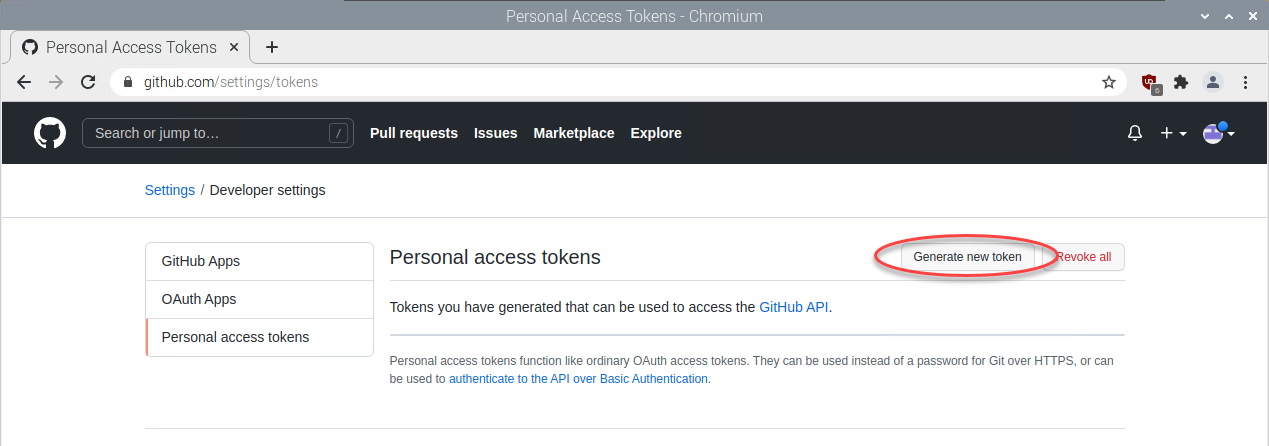
Click on Generate new token within the circled ellipse.
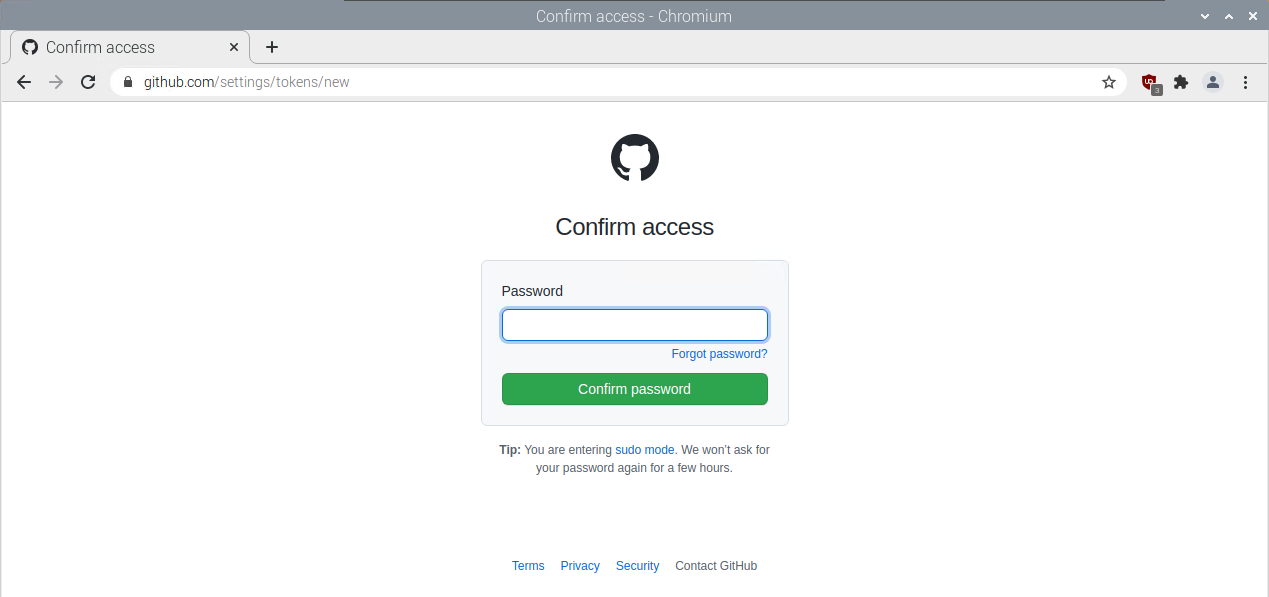
You will be required to confirm your access by entering your GitHub
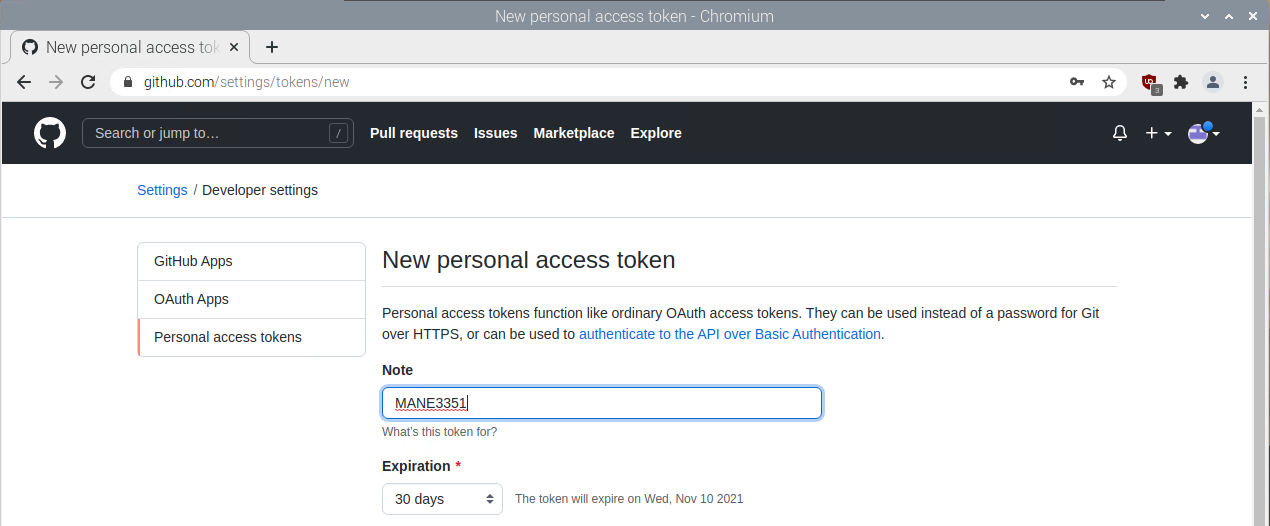
Begin the process of creating a new personal access token by adding text in the Note field.
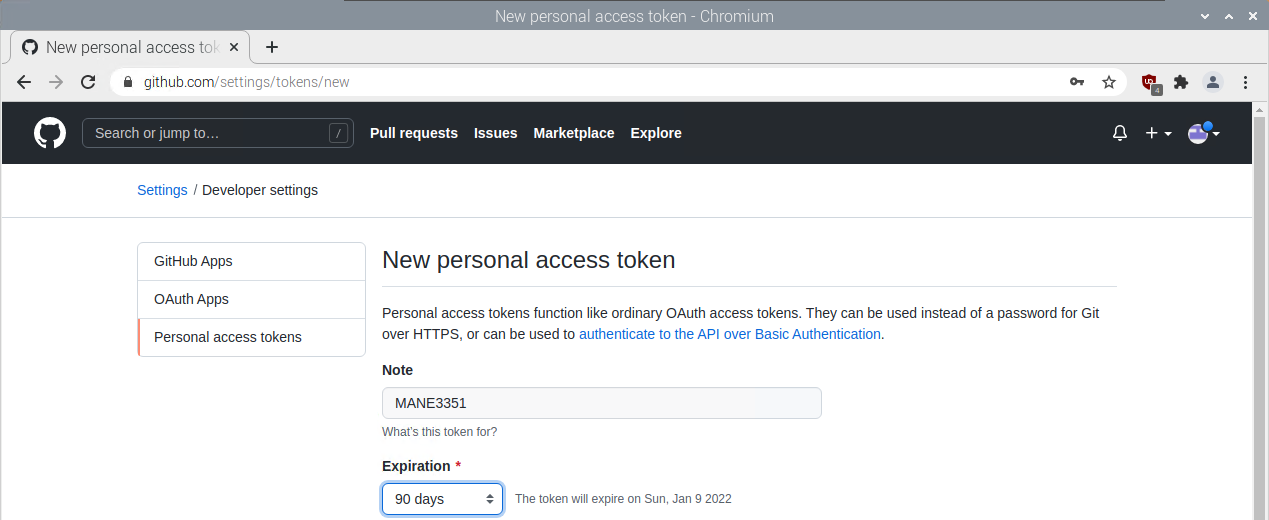
Click on the Expiration drop down menu and select the expiration date. I would suggest 90 days that covers the entire class time.
Click on the options repo and delete_repo. These options are circle in the image below.
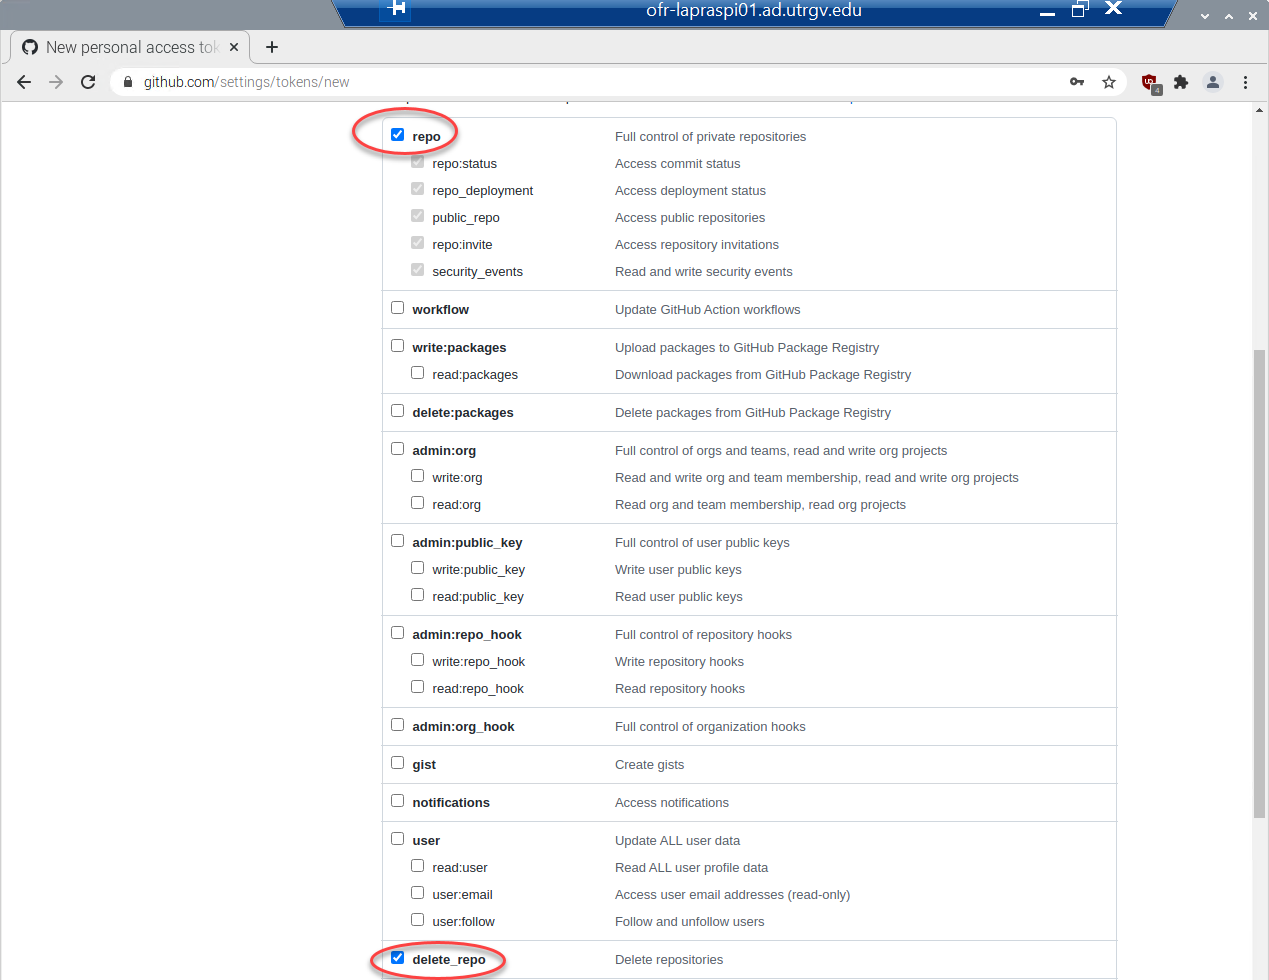
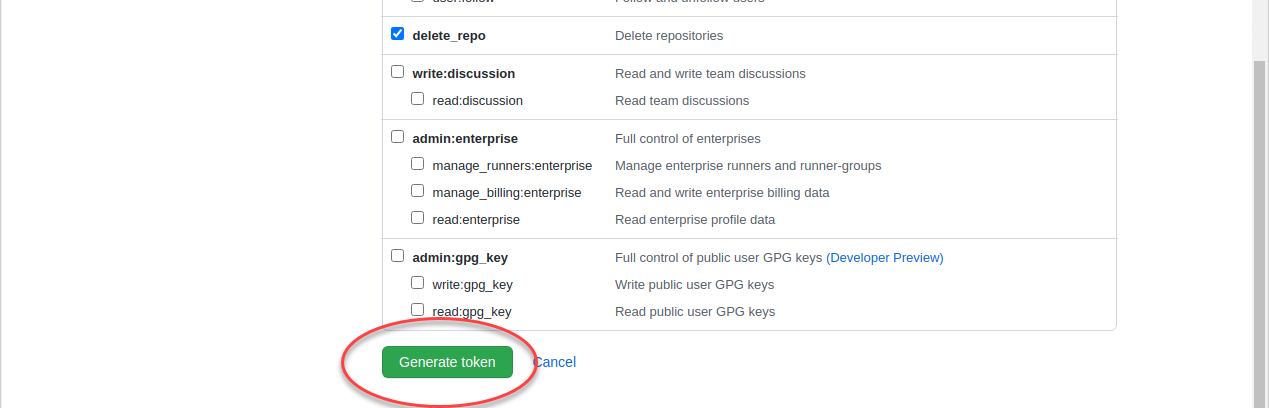
Click on Generate token button circled in the image below.
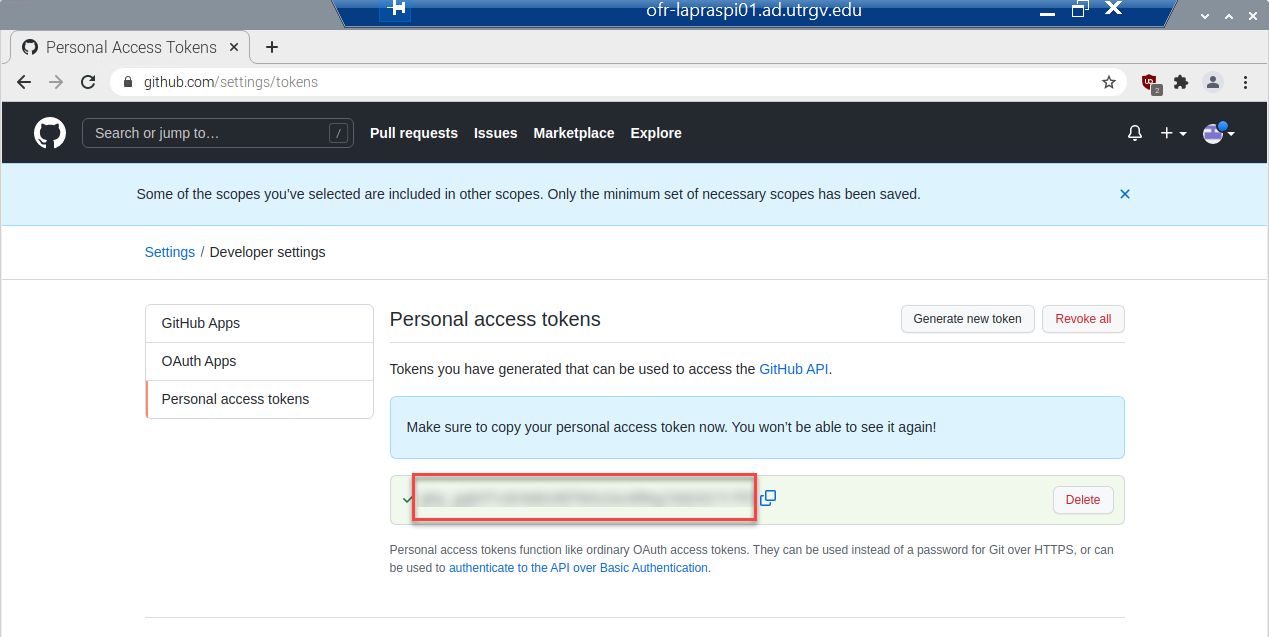
GitHub displays the new token. For security purposes, the key is blurred in the image below.
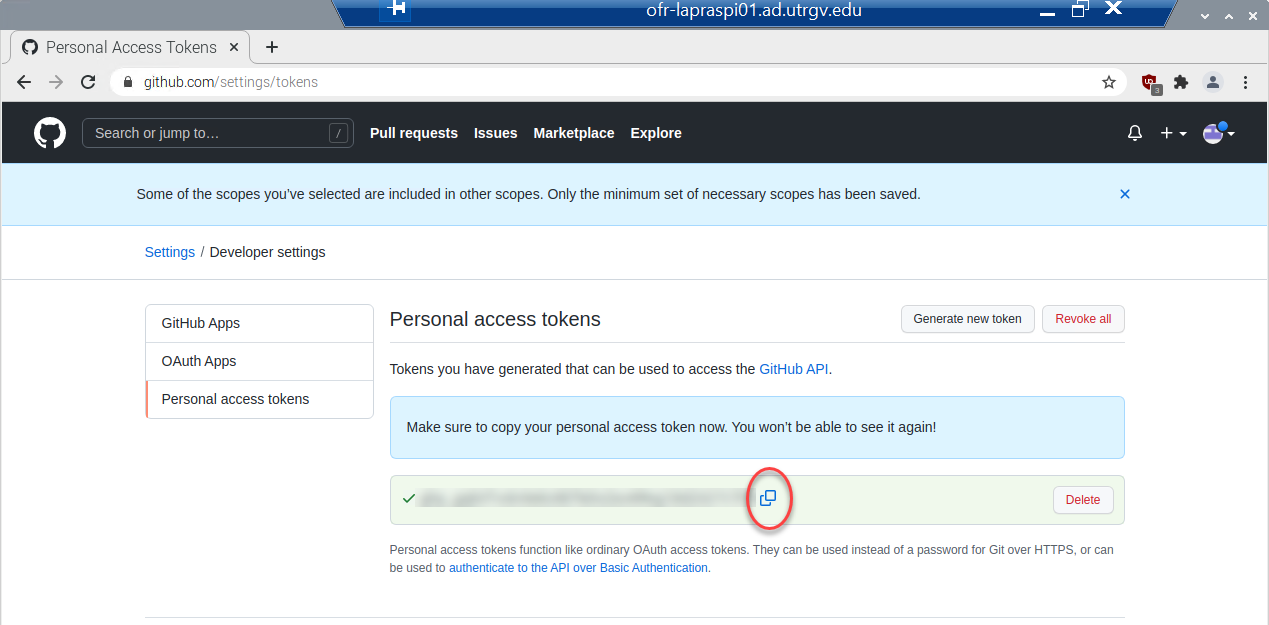
Copy the token to the Raspberry Pi clipboard by clicking on the circled icon shown below.
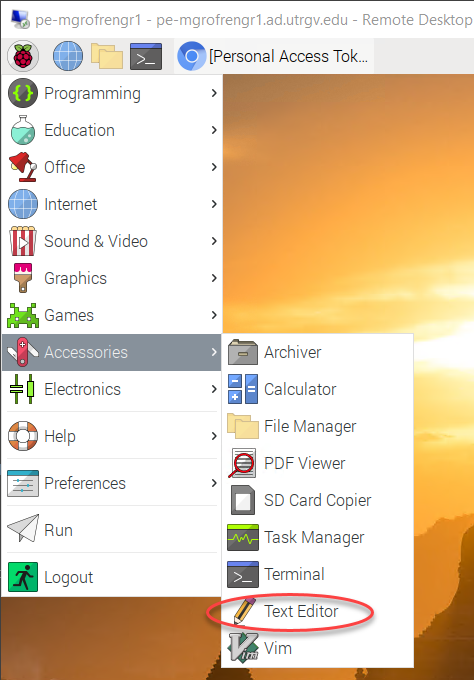
Open a text editor to save the token as a text file. Click on the Raspberry icon in the upper left corner of the screen and then select Accessories and Text Editor (circled).
The Text Editor will appear and paste the token text into the editor by using either control-V or Edit>Paste. Note that the token is blurred again.
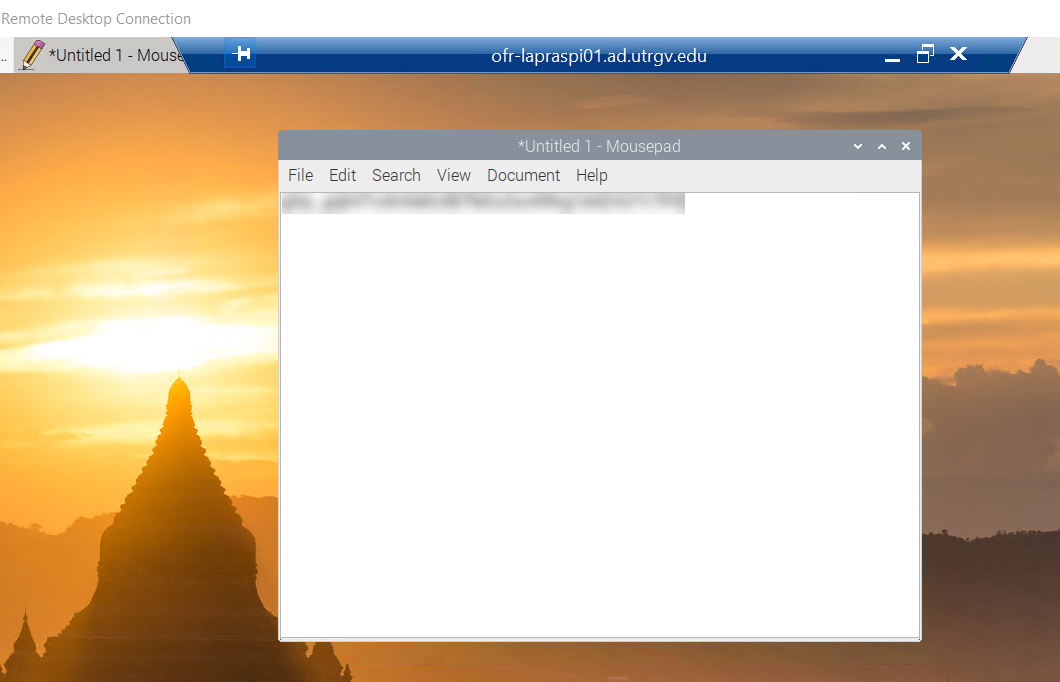
After entering the token, click on File>save. The example filename is githubToken.txt. At this point, the Text Editor window can be closed or minimized.
To check that the file was saved. A File Explorer window was opened and the results are shown below.
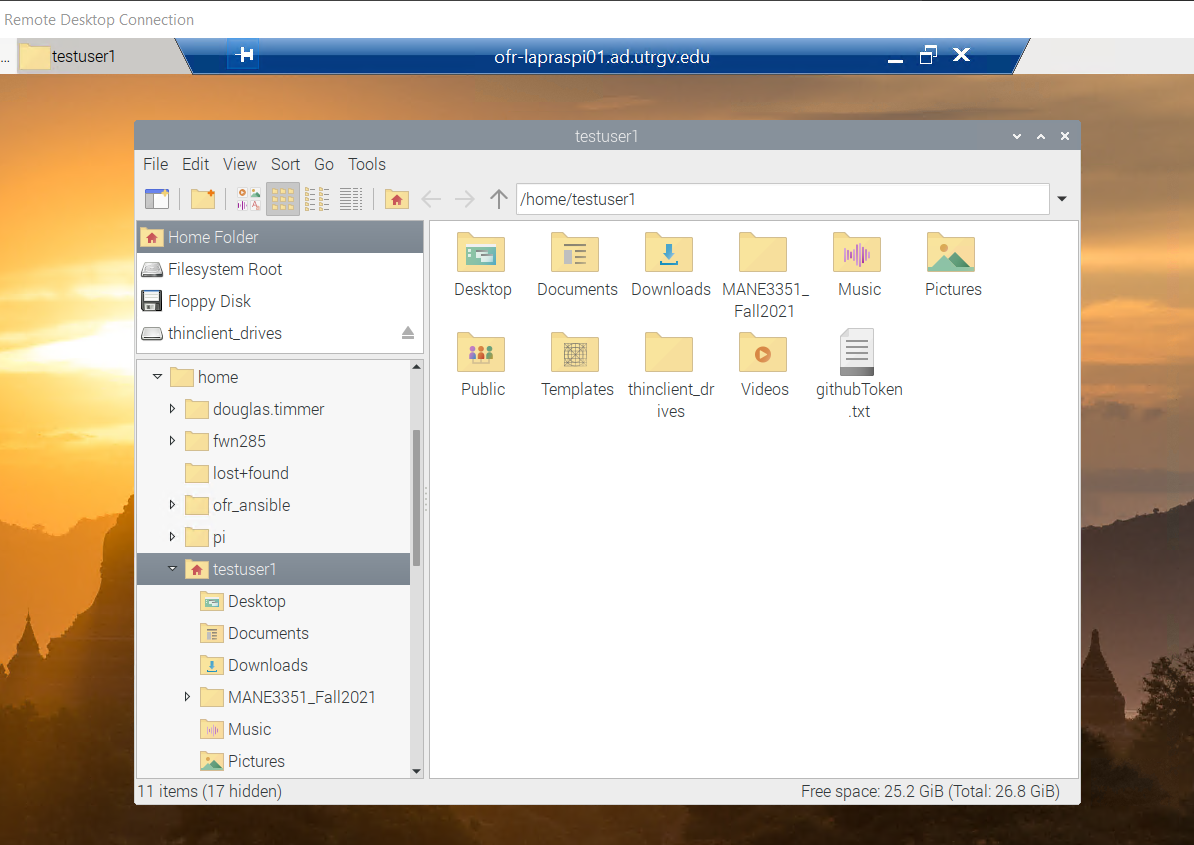
The creation of the GitHub token should only be done once in this class (as long as the token does not expire). You will need the token when using both the Raspberry Pi VM or physical Raspberry Pi.
Step 3 - Download Lab 2 Repository
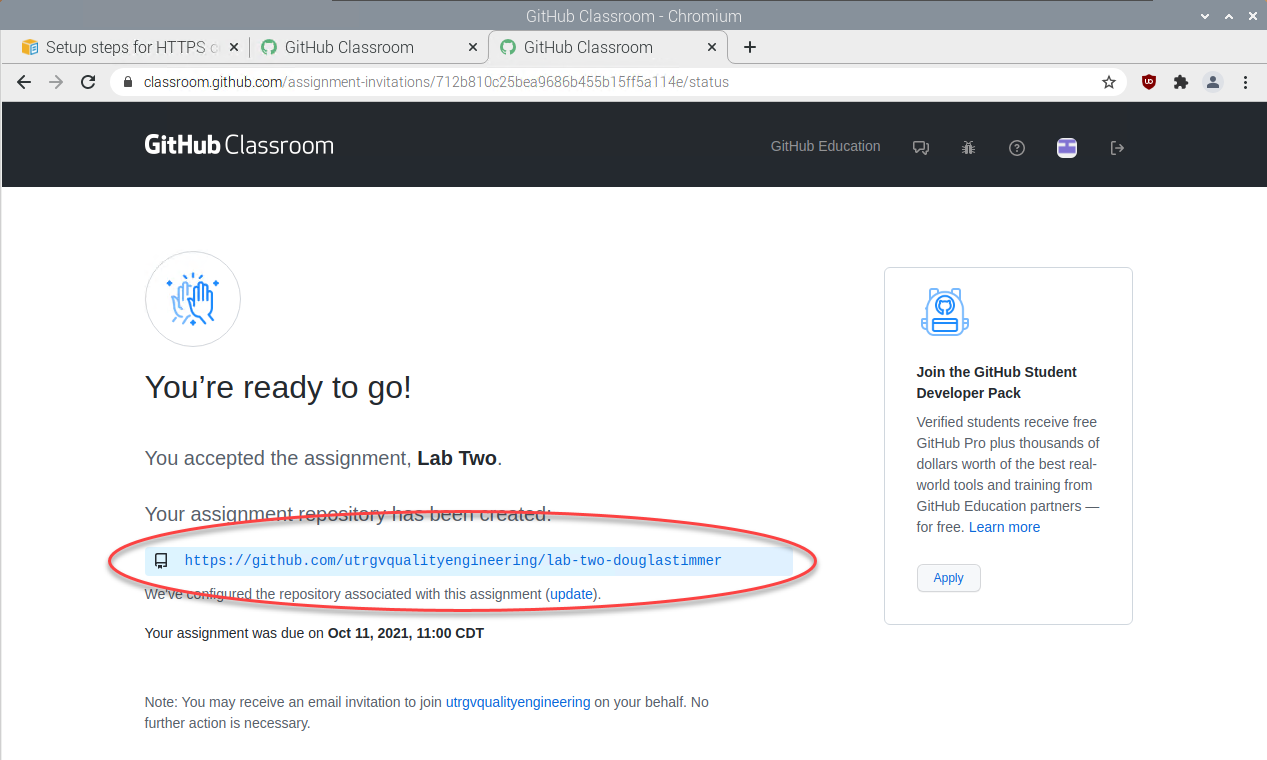
Dr. Timmer will send an email containing a link to each laboratory assignment. The link will look similar to the url found within the ellipse.
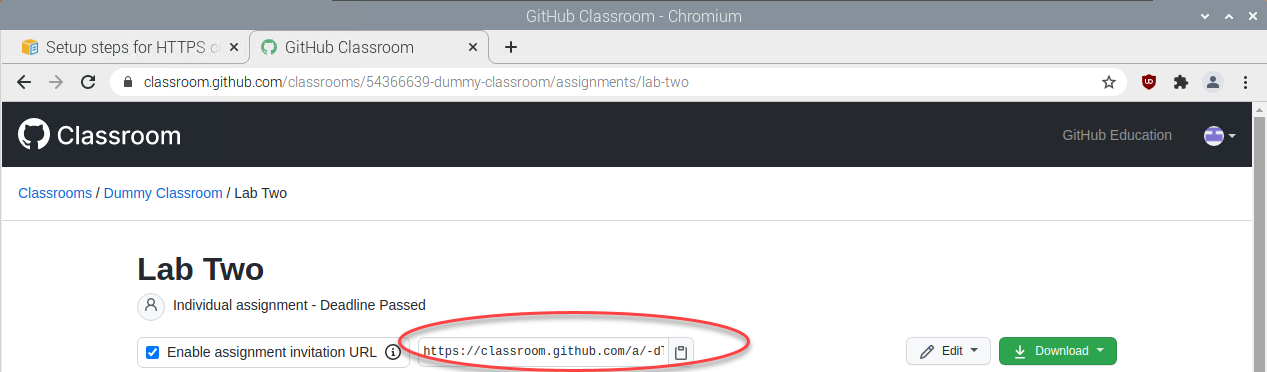
Copy the address into a web browser and then hit enter.

You will be taken to a GitHub Classroom site where you must accept the assignment. After accepting the assignment, a repository will be created. Often, you have to refresh the web page until you see the web page shown below. You will need the url within the ellipse.
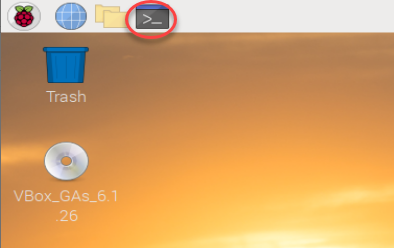
Start a new terminal session by clicking the circled icon.
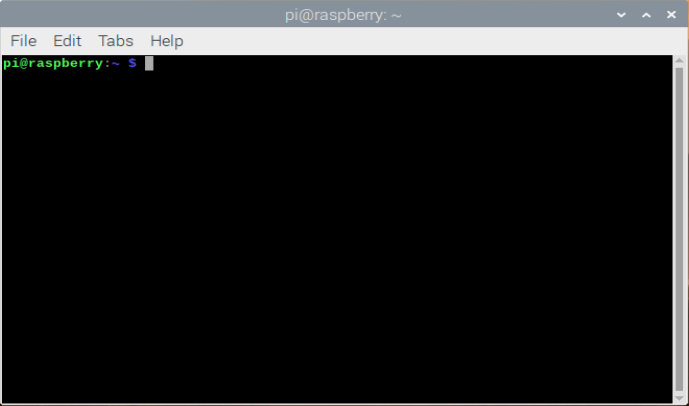
A new terminal window will appear that is in your home directory.
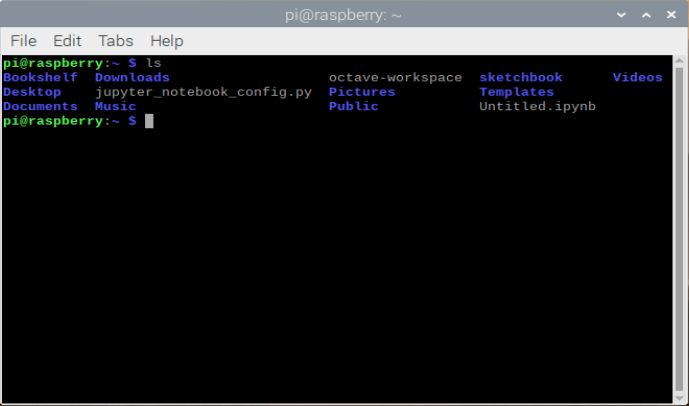
List the files in the home directory by using the ls command.
Use the git clone command with the url found four http://qualityengineering.utrgv.edu/MANE3351_fall2021/handouts/images up. You will be prompted for your GitHub username and password. The password is the token that you generated earlier, not your GitHub account password (this is very confusing). This is the reason that I suggested saving the token in a text file.
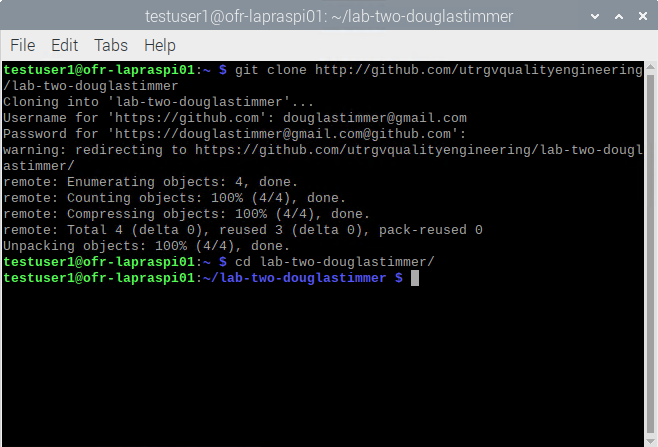
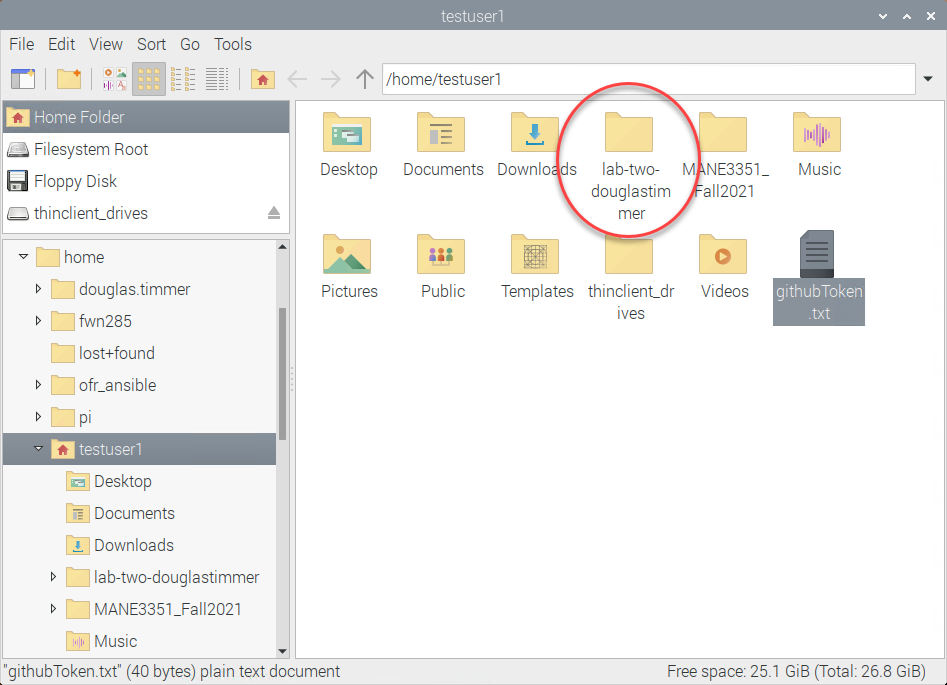
Use the File Explorer to verify that the directory for the repository has been created.
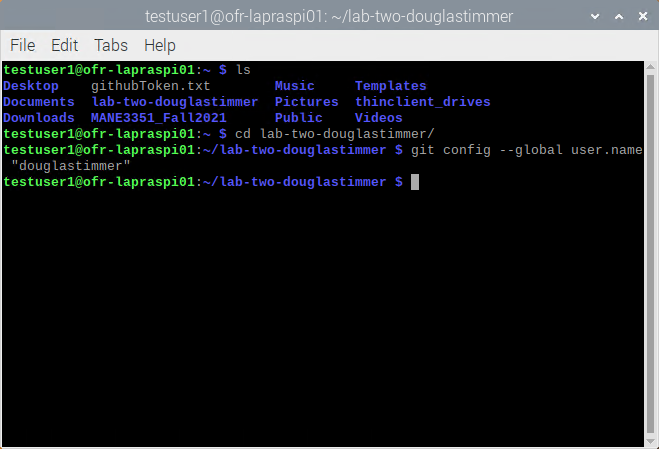
From the repository directory, configure GitHub by first configuring your GitHub username.
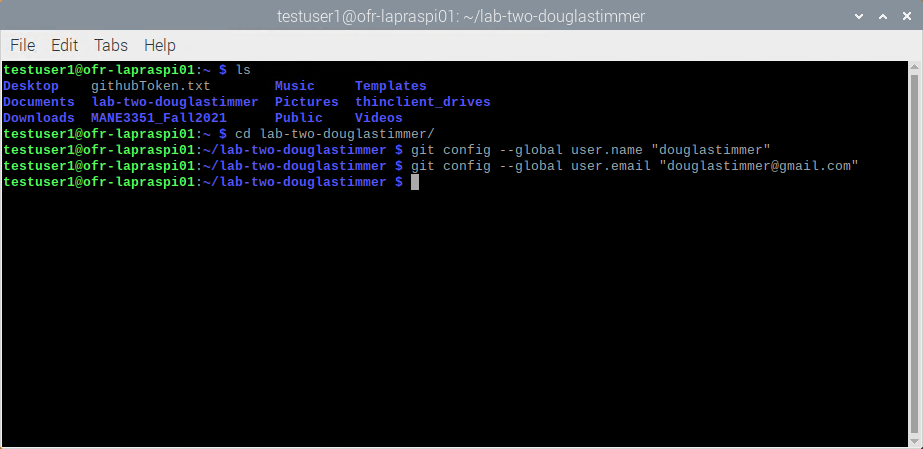
Next configure your GitHub email address.
The next step enables git for this repository to store the password that you entered when cloning the repository. This is a two part process; the first part is to configure git by entering the command shown below.
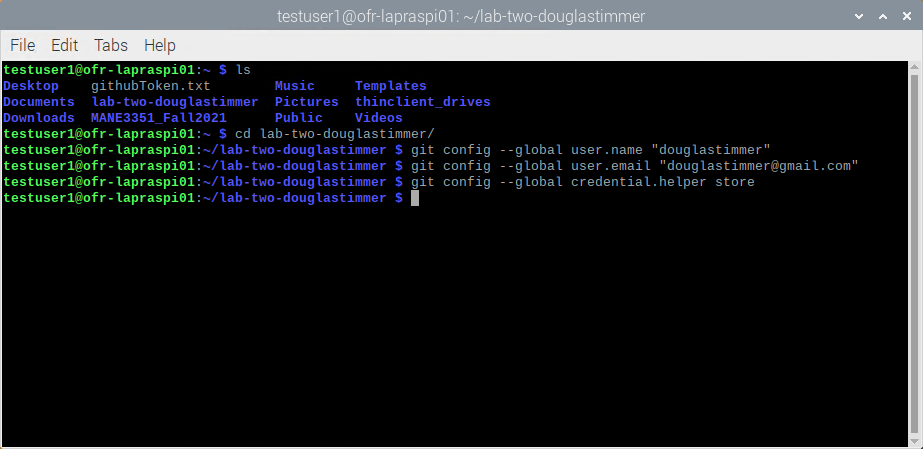
The second part is to issue a git pull command (git pull copies/updates files from the repository to the cloned repository). The git pull command will also cause all of the information to stored in the git configuration file.
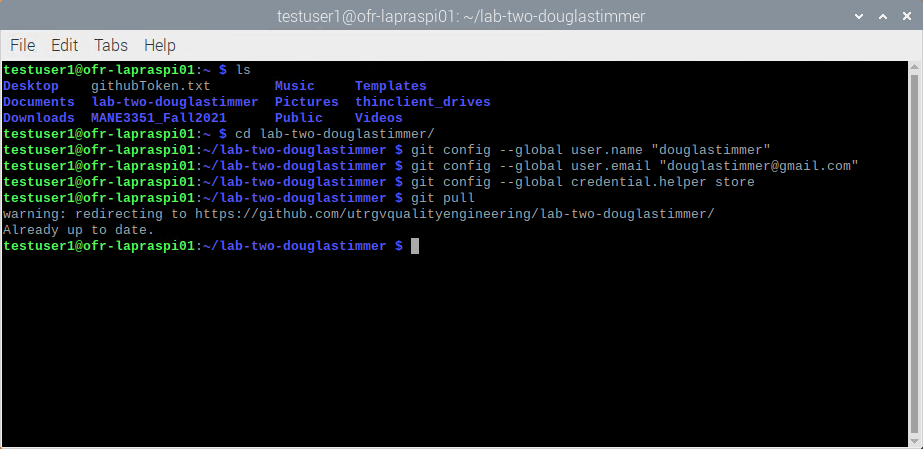
For each lab assignment, you will have to repeat the commands detailed in Step 3.
Step 4 - Update Lab 2 Jupyter Notebook
To update your Lab 2 Jupyter Notebook start with terminal window that is in the laboratory repository.
Enter the command Jupyter Notebook.
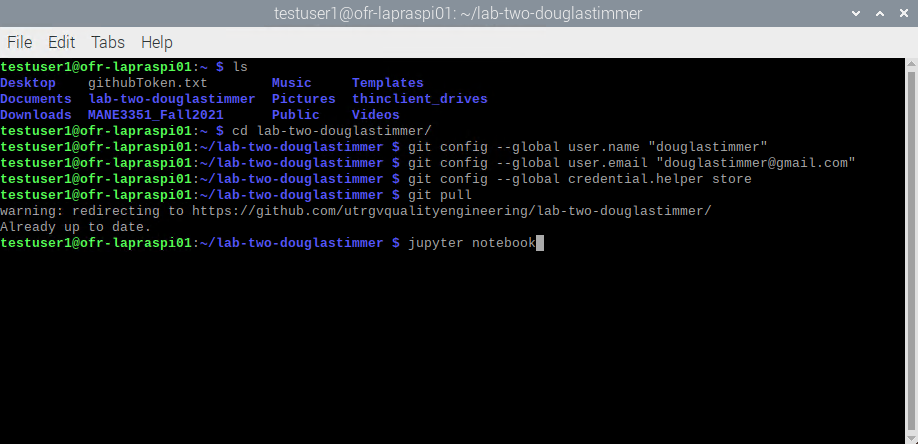
Hit return and a browser window will appear.
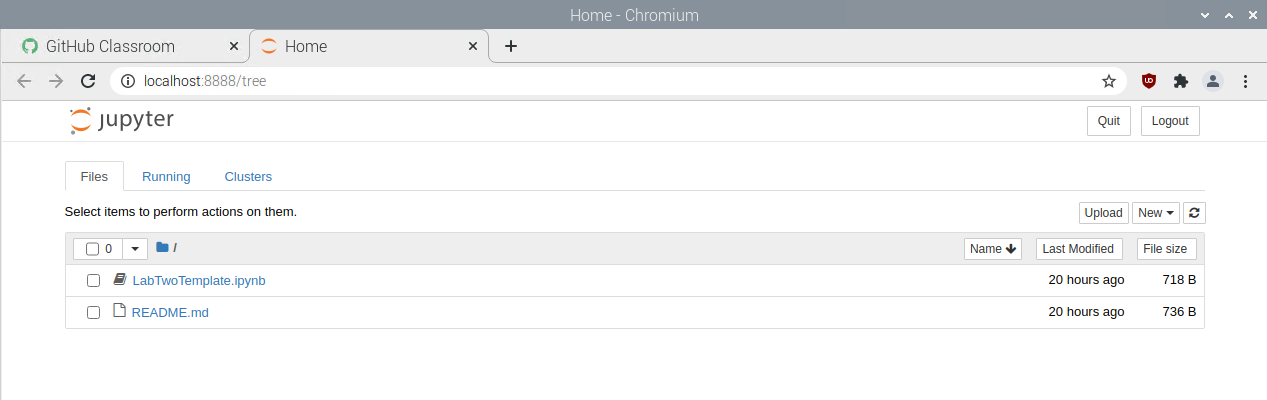
Click on the LabTwoTemplate.ipynb icon to start editing the Jupyter Notebook.
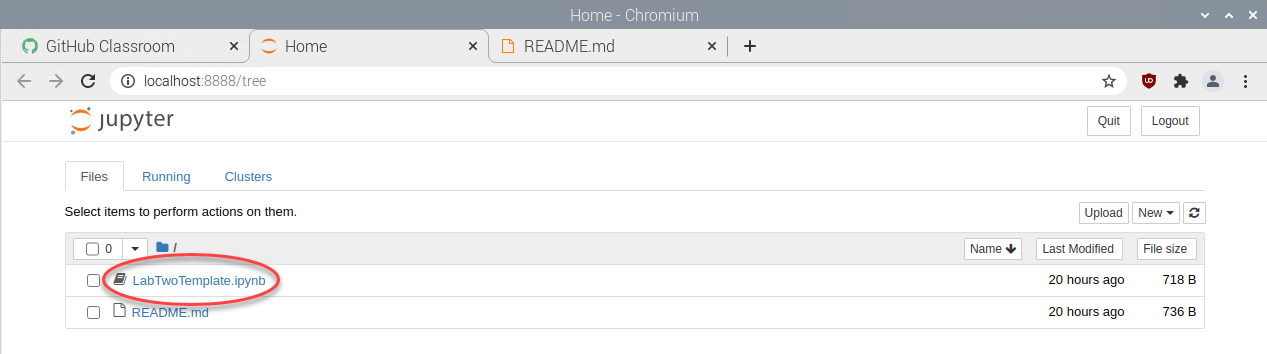
A tab is created that shows the results of running the Jupyter Notebook.
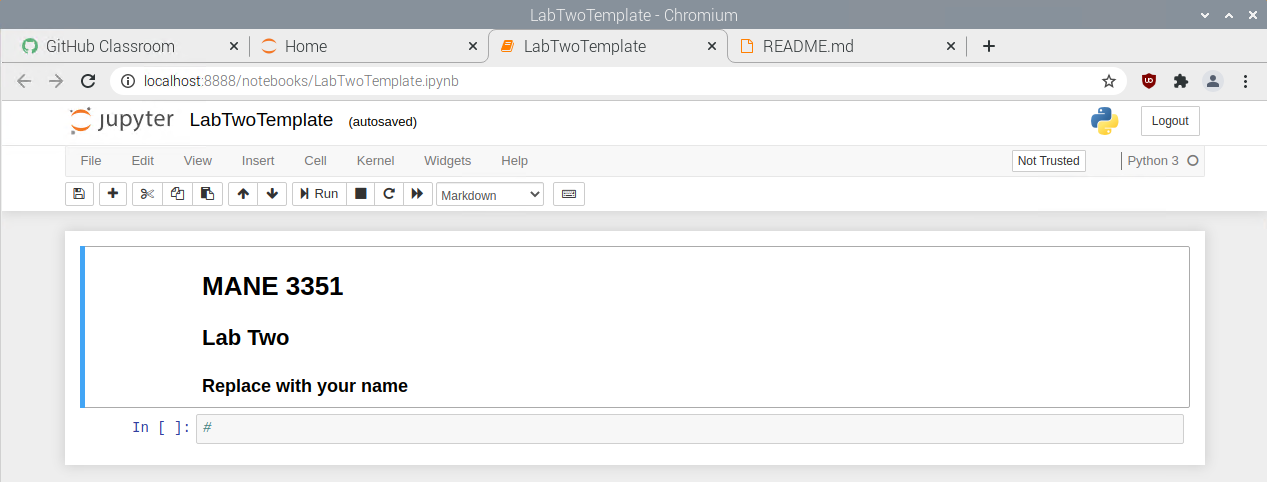
Double click anywhere within the cell to display the Markdown code.
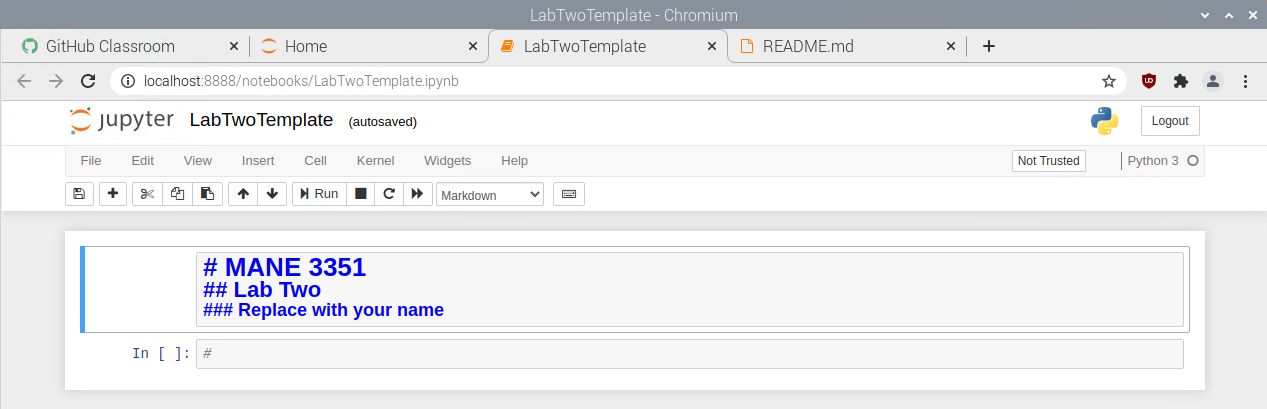
Replace the text “Replace with your name” with your name.
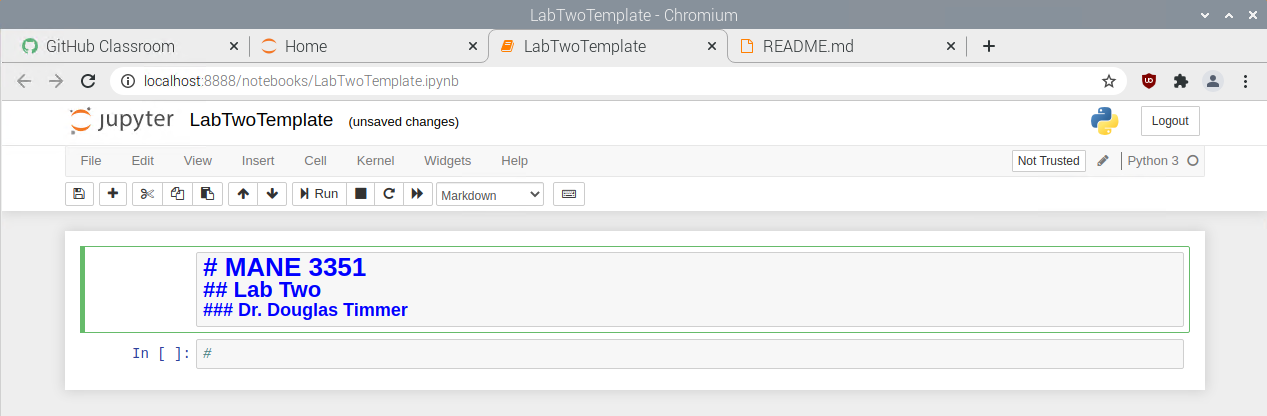
Click on the Run button to execute the Markdown code in the first cell.
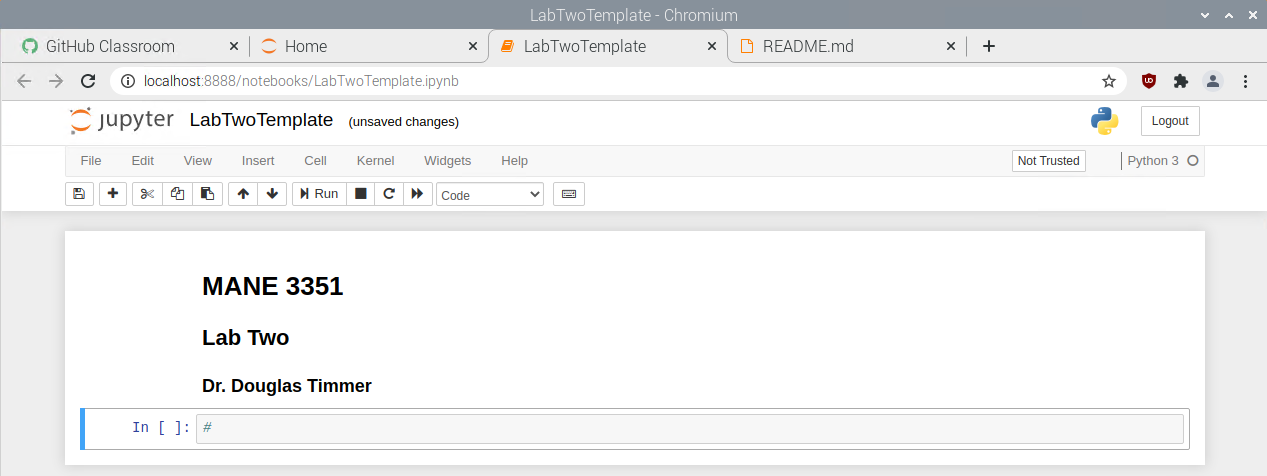
Notice that your changes have not been saved.

Click on the circled icon to save the changes that you have entered in the Jupyter Notebook.

The message last check point text indicates that the files was saved. There is an autosave function but you should always save your work before exiting.

The remaining items describe how to close down everything. You have two options and I will illustrate the longer approach. The other approach (which is probably simpler is just to close the browser). The long approach is to stop the kernel (program running Python 3).
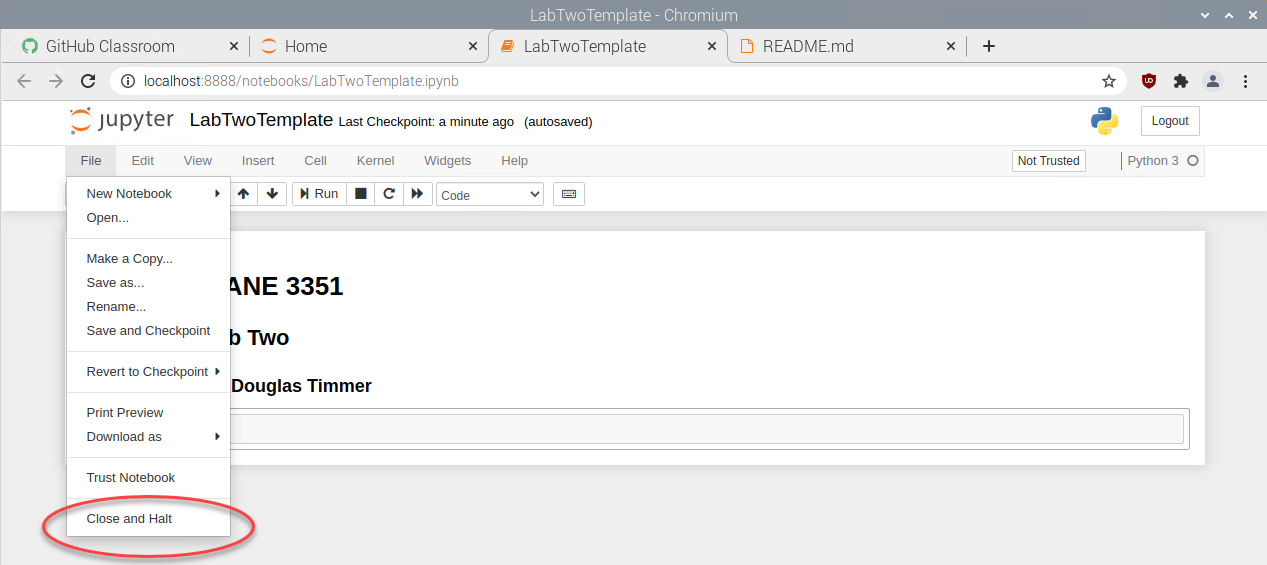
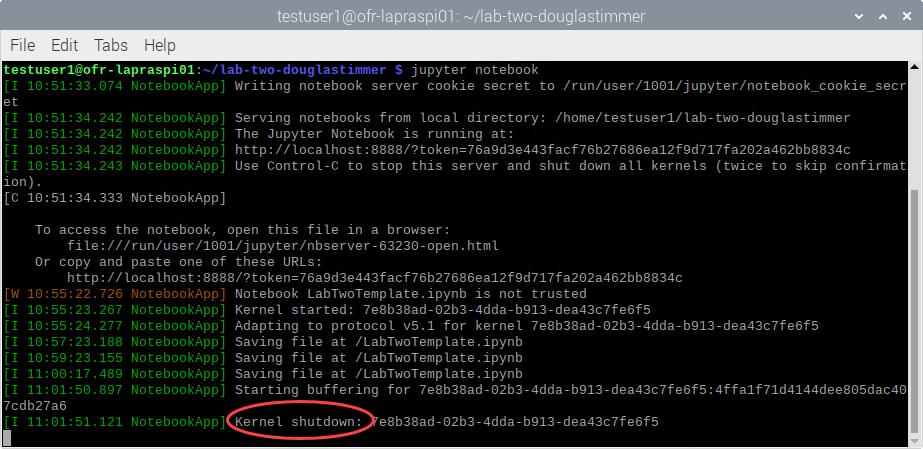
If you check the terminal window, you will observe that the kernel is stopped but the Jupyter Notebook server is still running.
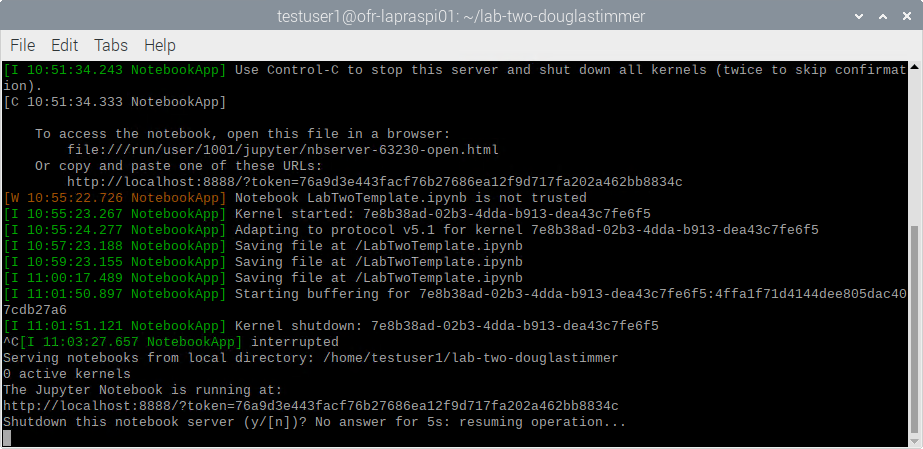
To shutdown the Jupyter Notebook server, enter control-C in the terminal window and then enter y.
The remaining step is to close the browser window.

At this point, your assignment has been updated. However, it is stored only in the Raspberry Pi VM or Raspberry Pi. To be graded the repository must be uploaded.
Step 5 - Upload Repository
At this point, you have updated the Jupyter Notebook file (.ipynb) but the local git repository is not aware of the changes. Start a terminal window and change directory to the cloned repository location.
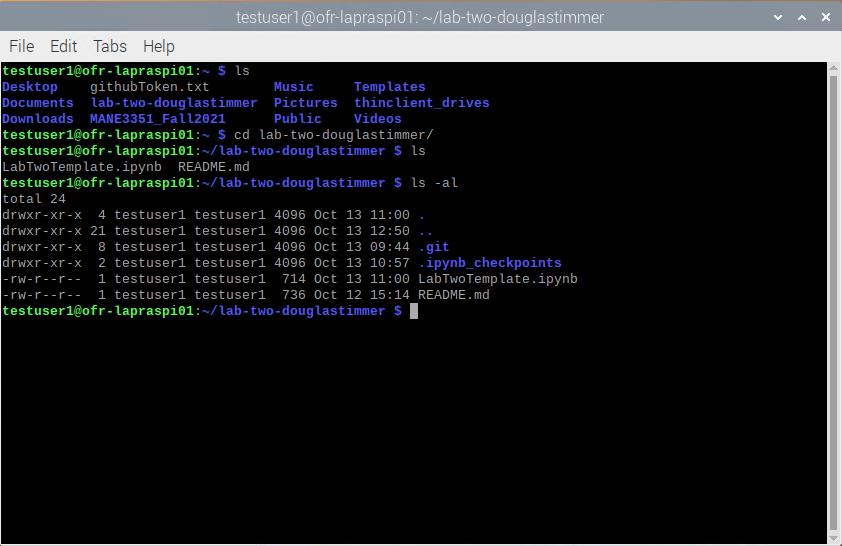
You must first add all of the change files to the git repository by typing git add -A and hitting enter.
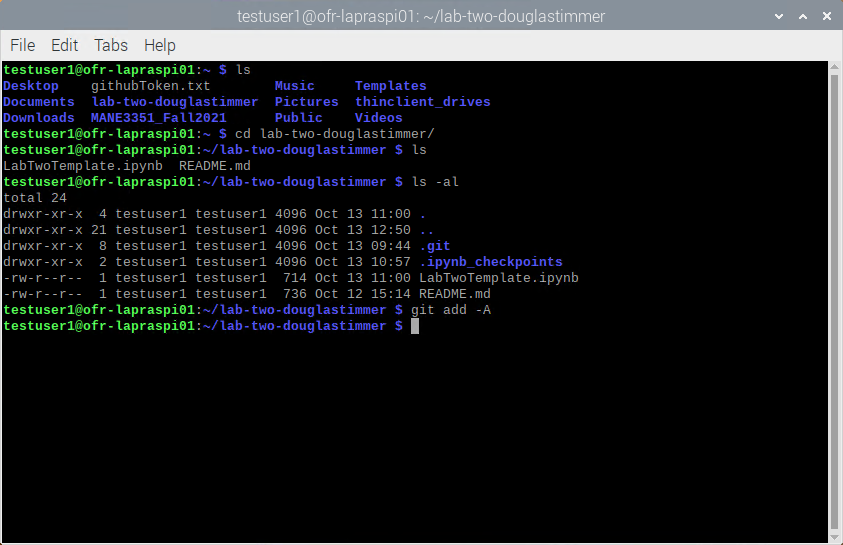
The next step is to commit the changes to the local git repository. I always recommend adding a message to the command. Type git commit -m “my message” and hit enter.
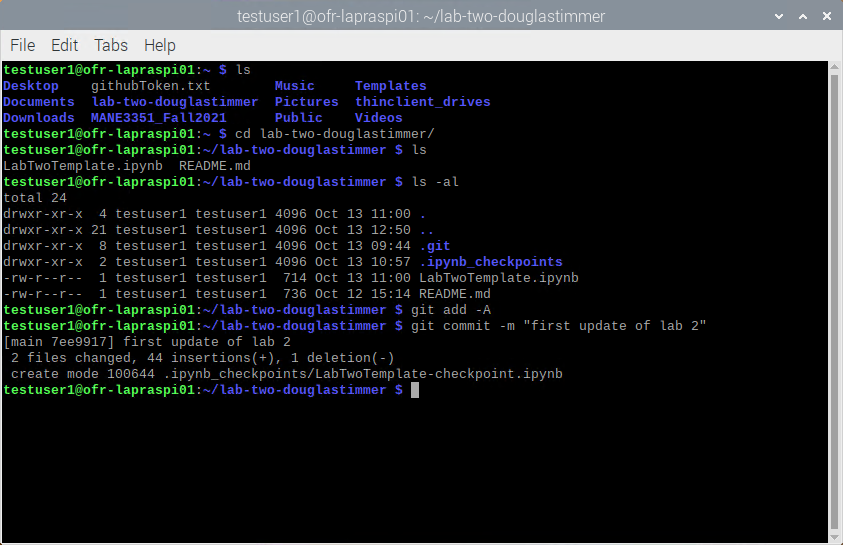
The local git repository has been updated. Notice that you are notified that there were two file changes. The final remaining step is to send your local git repository back to the master repository so that it may be graded. Enter the command git push and hit enter.
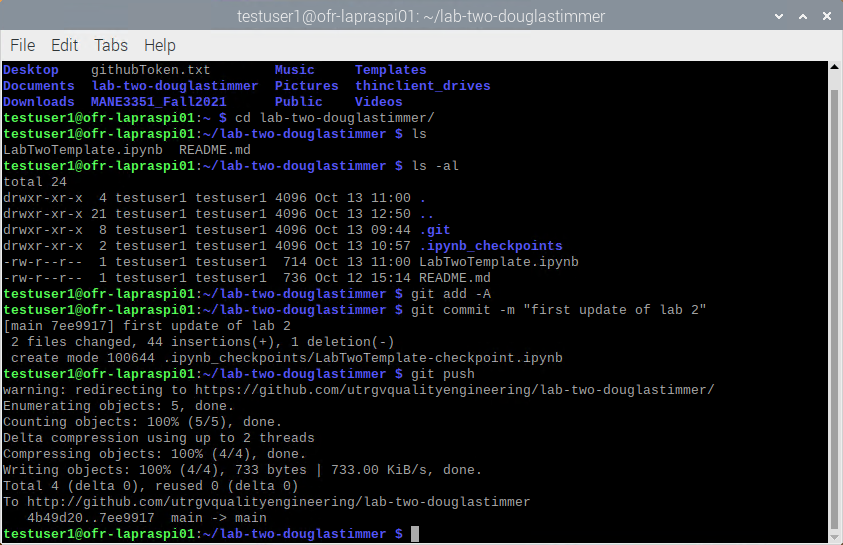
The upload is now complete and you have completed the second laboratory.